beauty lies within

expressing self by creating

a new territory March 31, 2008

I was asked, by two of my dear friends who are to wed this year, if I could make their wedding invitations.  Oh man!  This is an area I haven’t touched until recently.  I met with the Bride & Groom-to-be and they brought me a pic from a wedding magazine and asked me if I could re-create the card they loved.  Looking at the sample and seeing that it resembled the flowers from SU! Artfully Asian set, I said, “yes”.   I wrote up a contract, explained the “Angel Policy”, gathered up all supplies I would need, and got started.  This meeting is what made me fall in love with the color combo of Vanilla, Navy, and Turquoise:)  It’s hot I tell ya! 

Note (I blurred out all names and personal info so it may look a little wierd to you).  I started with a box that coordinates with their colors and simply states “thank you” on the lid as my little package gift to them.  I placed all of their invites and such in this box.  They could use this box later for thank you’s they will need to send out:

wedding invitation box  I purchased a box at my local craft store.  The top was covered with SU! DSP (retired but matched).  Added a strip of Navy Satin Ribbon.  Topped off with the sentiment made from sets Artfully Asian & Frames with a Flourish.   The sentiment has two layers with the upper layer attached to bottom stamped square with Stampin’ Dimensionals.  I did notice that it was slightly off center and did fix after I took the pic 🙂

wedding box inside  Lid removed from box to reveal shimmery white vellum.

wedding box inside 2  Here is the presentation of the invite package once the vellum is lifted up.   The package includes the invites, rsvp postcards, envelopes, and place cards for seating.
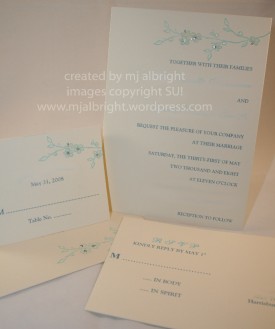
wedding package  It is rather hard to see details, but all flowers have Crystal Effects to them.  There are little dry embossed circles to the rsvp card to separate the response section from the return address section. 

Here is another pic of the wedding package from a different view:

wedding package 2

I will be making a gift for them that I will post once I finish it (well, have to start it…lol).  I want to make them something to showcase their invite.  It will be framed and elegantly decorated to coordinate with their theme. 

TFL and have a wonderful day:)


Taylor’s Cupcake Challenge March 30, 2008

You all know the fantabulous Taylor Vanbruggen right?  This is another woman I had the honor of meeting out at CHA in February.  Not only is she an amazing artist….girl should be a model. 

Every Friday Taylor has a cupcake challenge, with some really cool sketches, that you can participate in.  I had some time this weekend to give challenge #9 a try….and I LOVE how  my card turned out:

taylor cupcake challenge card  The froggies are so cute.  Also, showing how you can combine two totally different companies & styles in one card.  The sentiment and mushroom image are SU! Unfrogettable set.  The two frogs are from The Cat’s Pajamas Loving Mew & Puppy Love sets.

Hope you head on over to check out Taylor’s challenge.  She is also giving away a cool tool to a lucky person:)

Have a wonderful evening.

STAMP SETS:  SU! Unfrogettable; TCP Loving Mew & Puppy Love

CARDSTOCK USED:  SU! Chocolate Chip, River Rock, Tempting Turquoise, Old Olive, Certainly Celery, Shimmery White.  PP from k-i memories “my guy funky stripe”.

INKS USED:  Stazon Jet Black Pad; SU! same as CS above plus Soft Sky pad; SU! markers Old Olive and Chocolate Chip.

ACCESSORIES:  Sponge, 1-3/8″ & 1-1/4″ Circle Punches, 1-3/8″ Square Punch, 3/16″ Corner Rounder Punch, Ribbon — American Crafts Elements Oxford #88381.


(long story) Living with a BEAST…..

isn’t always easy.  There are many responsibilities as a pet owner….one being that no one gets hurt.  Let me set the scene for you.

Here is the beast that some of you are aware I have:

bailey bear

It was about 6:30 in the morning a couple weeks ago.  I took Bailey out back of our home to do his business.  Yes, he was leashed.  He got away from me and took off towards the front of our house.  Perfect timing that there would be a woman walking her dog.  My dog has issues…he is aggressive towards other animals (ie: dogs, cats, birds, squirrels, worms, grasshoppers, etc..lol)  He likes to believe he is the alpha of all alpha males.  Now, with that being said, some may know that Saint Bernards are so loving towards people.  Due to his wierd animal behaviors, we keep him on our property at all times and many neighbors don’t even know that we have a dog.  He doesn’t get to go for strolls through the neighborhood cause I wouldn’t be able to restrain him if we did encounter someone else walking their dog (he is up to 170 lbs.) 

So, this woman walking her dog is one of those good pet owners who walks her dog 3 times a day and works on obedience training with her dog.  She rescued her dog when it was young from an abusive environment so her dog has issues as well with other dogs.   Now, picture it….my dog goes running towards her and her dog out front of my home.  They start growling and fighting.  We were both screaming.  I was able to grab my dogs leash and pull them apart (I was afraid to go near her dog being it looks like a Pitt Bull and I have issues with them for some reason….now, this woman will have issues with Saint Bernards and I totally understand).  She was very stand-offish and just walked away from me.  I looked down at my dog and he had blood on his mouth and face.  Great!  I put the dog in the house and jump in my car to go talk to the woman.  I was so upset and apologized like you wouldn’t believe.  I wanted to make sure her dog was okay, explain what had happened, and inform her that my dog is up on all his shots and such.  She was so nice to me and asked how my dog was.

I get back home to check out my dog and the blood wasn’t from the other dog (which I first thought).  My dog was the one who was injured with 4 punctures to his face.  He limped around for 2 days.  He is 100% better but still continues to have his issues with other animals.  I waited to see if I would be contacted from someone or how ever that process works if someone reports an incident and I didn’t get a phone call or letter.  What I did receive was a very nice “Thank You” card in my mail box for showing concern and apologizing.  She went on to explain the history of her dog and she wanted to make sure my dog was okay.  HOW SWEET RIGHT?  I was so relieved and this will be an isolated incident.  We have had our dog for 5 years and this has never happened. 

To show my appreciation, thanks, and to apologize for causing any distress, I made the following items for her:

 neighbor gift 1        neighbor gift 2

The first set features a SU! retired stamp set “Ruff Day” that I had to use cause it was one of my favorites and appropriate to use. 

Here is a breakdown and single pic of each card:

neighbor fire hydrant card  Cause I know some will ask….this fire hydrant card I cased from the most talented Lauren Meader.  She has a tutorial on her blog that you can view here.  The only thing I changed from her tutorial is I didn’t have any oval stamps so I used Word Window Punch.

neighbor doghouse card  Yep, I so love this one.  I used Key Tag Punch for the doghouse door.  The bottom horizontal CS pieces I created with Word Window Punch and just cut longer pieces of cs for the top of the house.  I’m lovin’ the sign…lol

neighbor ruff day card  Simple but didn’t want to take away from the dog collar I created with Silver Brads, 5/8″ Old Olive Grosgrain ribbon and I forget where I purchased the clasp/buckle.

Now, since she always walks her dog, I thought I would also create 3 of each of the following cards (6 total) with envelopes and different sentiments so she would have cards handy to send out to people.

neighbor stamping bella card  I love this Stamping Bella image.  What pet owner wouldn’t?  It is called Dogwalkabella with “need a hug” sentiment.  Paper is American Crafts “sixth avenue gramercy park”.  The Light Yellow card base and envelopes coordinate and are from Gartner Studios which I purchased at my local craft store. 

 neighbor MFT card  I used MFT set Let’s go for a walk for this card.  Same line of paper (can’t find on the amer crafts website..must be older). 

So, I know the gesture will be well received.  She does continue to walk her dog by our home.  We wave and all is good:)  Oh the life of a pet owner. 


TUTORIAL…..Soldering intro March 29, 2008

Ahhhh, how about a way to showcase your work that doesn’t always involve card making.  Doesn’t that sound good.  Think….ornaments, hangings, and home decor.  Let me give a basic intro to Soldering.  I was honored to spend a day browsing CHA with the most fabulous Ellen Hutson.  I know right.  I was trying to take it all in.  Yep, I’m a nerd with a tablet taking notes from her….lol.  What can I say.  I try to remember ALMOST everything someone says to me.  Well, during that day, I was introduced to soldering and was impressed by the possibilities and how I could showcase my work in a different light.

Mother’s Day is right around the corner.  My Mom loves & collects butterflies.  Here is a little something for her:

soldering sample upclose  Isn’t this amazing?  Picture this hanging on a window,the wall, or a door handle.  See, my Mom will receive so much more than a card this year.

Here is a full view of the hanging:

soldering sample

————————————————————————- 

TUTORIAL– BASIC SOLDERING

Here is a pic of the kit I purchased at Ellen Hutson’s store:

soldering tutorial pic of kit  You will get everything in this kit to get started right away.  There is a tri-fold pamphlet inside with directions and step-by-step pictures.   

soldering step 1  Color your stamped image and cover with pieces of glass.  Images Checkered Butterfly & IB Butterfly are from Lockhart Stamp Co. purchased at Ellen Hutson’s webstore.  I used Prismacolor pencils (Non-Photo Blue, Sky Blue Light, Indigo Blue, Chocolate, Cream, and White).  I sponged the edges of the CS with SU! Soft Sky ink.

soldering step 2  Wrap Copper Foiling around the outside of the glass.  The foil does have adhesive on the reverse side.

soldering step 3  You will want to fold in the sides of the foil.  I started with the side pieces being careful at the corners so that when I folded down the top and bottom there were no rough edges or bumps.  You want to smooth it out and rid all the air bubbles.

soldering step 4  Here is a pic of the sides folded in so you can see the corners. 

soldering step 5  Use an Exacto Knife to trim the foil.  It is really easy to cut and peels right off. 

soldering step 6  You will next want to place your project in the holding clamps that come with the kit.  You do one side at a time.  Apply “Flux” to the side you are working with.  Use soldering iron and solder to the side.  I didn’t apply that much since this is still new to me.  You will then repeat to all sides.

soldering step 7  Here is a pic of the first side I did (top).  I started with the top and worked my way around. 

 soldering step 7  Once you are finished soldering all sides, file any rough areas with a file.   The reverse side is a buffing file to finish the project.

 In my sample above, there are jump-rings.  Well, I can’t take pics of that process.  This step takes practice and is the only area I had some trouble with.  I think it is because I’m a perfectionist and was trying so hard to form a nice mound of solder.   I did finally get two jump-rings to the top of my project which I threaded Navy Organdy ribbon through.  The little soldered image was so fun to make.  I used my SU! Pretties Kit and soldered one of the pins to the back of it.  LOVE IT!!!! 

Here are some recommendations:

The soldering iron is HOT.  Yep, I burned my thumb

Please, don’t do this with kids around.  I waited until my kiddos went to bed just so there wouldn’t be any accidents.  My little Ethan is always around me when I’m making projects and he grabs stuff and runs from me.  This is not a tool I will be using with him around.

Be careful with the copper foil when you trim it or little shavings will get into your skin….nothing serious.

Make sure your work space is free from clutter.  I used a cutting board to work over just for any solder that may drip.  The kit does come with a soldering iron stand/holder.

Like mentioned above, practice with the jump-rings is something I will indeed work on. 

The possibilites are endless.

Here is another addition to my supplies…..Prismacolor pencils.  I sometimes get tired of watercoloring so I thought I would show you my work with pencils:)

my pencils  Can’t stay away from watercoloring for long….I just received all the Ranger Re-inkers to play around with.  That will be tomorrow.  I keep telling my husband that “I NEED” these necessities to grow…lol  But, it’s true!

Hope you enjoy and continue to enjoy your weekend:)


Beate’s weekend sketch challenge #41 March 28, 2008

First, I must say thanks for all of your comments over the past two days.  I read every comment and think I have replied to all of them:)  Such a supportive group of people visiting me.

Second, I am so glad it is Friday.  I don’t have to work this weekend so I am really excited to be home.  I’m getting the urge to do some spring cleaning and have a list compiled for hubby to help out some.  I’m sure we will probably decide to postpone the tasks and just have some family fun.   Hershey Park opens to Season Pass holders and I would really love to take the kids.  Or, should I just stamp.  See, told ya I’m so excited to be home.

I love this weekends sketch.  You can check out the details on Beate’s blog if you would like to participate.

beate wsc #41  Ignore that eraser mark to the left of the image (oops moments do happen).

I had the honor of meeting Emily Block (Presidentabella) of Stamping Bella while at CHA this past February.  She is an amazing woman.  So is Nicky.  I think I could have carried on a conversation with them forever.  Truly amazing!…and so are the images.   When I saw the above image, new friends ella and looloo, I had to have it.   And, such the perfect sentiment for the set, need a hug?  This is a card I will stash away and give to my daughter when she needs a little “pick me up”.

The card base is Going Gray CS 4-1/4″ square.  The patterned paper is SU! Bali Breeze DSP.  The lock charm I can’t remember which craft store I purchased it at…I have had it for some time.  I used Vintage Brads to coordinate with the lock.  I added Cotton Candy Stickles to the crowns, dress sleeves, and necklace on ella.  Ribbon used is Basic Gray Taffeta Ribbon. 

Check out the blogs of these talented ladies to see more takes on Beate’s wsc:

Cambria Turnbow

Charmaine Ikach

Jenn Balcer

Laurie Schmidlin

Lori Craig

Sharon Harnist

Have a wonderful weekend:)


spill the beans March 26, 2008

Okay, I can breathe a sigh of relief because I can officially state, “I mailed in my entries for the 2008 Artisan Award”.  

Let me share with you what I can…..the stats:  over 100 hours of work, took 2.5 months of creating (I’m not a last minute rush person who likes pressure), I like to believe it is the best work I have done to date, 3 hours of sleep a night, $46.00 in postage, over $700 for product.  Now, I shall shhhhhhh up and leave it in the hands of  Stampin’ Up! 

You may ask is it worth it, and I have seen mixed comments regarding submitting artwork to Stampin’ Up!  I don’t know if I can explain the feeling, but when you see your work displayed in an environment with people who share the same love for something, it is truly amazing.  To see the pages of my children last year hanging up so far away from my home, it is amazing and moving emotionally.  

I have received comments stating, “Why are you entering again?”, “Let others have their turn”, and some others that I wish not to share.  I must say, I create to inspire and share with others.  I owe so much to SU! for recognizing my work.  I wouldn’t be “known” if it wasn’t for submitting my work.  I hope that every time I post something you can walk away with an idea and want to go create.  That is why I do what I do.  I put the work out there to share.  I am always willing to respond to questions on “how to” do something.  I have my blog so I can do that with all of you:)

Now, I can get back to blogging and share some things.

I did do a workshop this month and it went really well.  There were 19 people who attended and it was a blast with a St. Patty’s theme.  I wanted to make “wow” cards that I consider easy. 

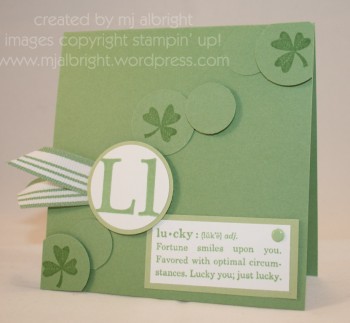
lucky workshop card  So simple and you get to play with all the different punches.  Showcases some of the more pricey stamp sets….but with these three sets (Holiday Blitz, Defining Alphabet, and Define Your Life), you can pretty much make a card for any occassion. 

scallop flower workshop card Card #2 is even easier.  I used a SAB set and showcased how ribbon can add so much to a card. 

I made packets for all who attended with all of their supplies and a step-by-step direction sheet for them to use and take home with them.  It had a finished pic of the card along with all supplies needed to create and re-create:

workshop directions  Go ahead, copy and paste.  They are easy cards and I don’t mind sharing:)

Here is the hostess gift I made for my friend:

hostess gift Yep, I did realize the top ribbon retired, but I wasn’t changing a thing once I finished.  It is a metal planter that you can purchase at any local craft store.  I covered with DSP and added all the details.  Everything inside coordinates except for the card I made her days prior to making the gift.  

hostess gift inside  There is a flower on a wooden rod that is cut out of the pic.  It basically was made with Stitched Exotics and coordinated with the theme of the gift.

I have so much catching up to do.  Hope you stop back later.  Have a wonderful day:)


Beate’s weekend sketch challenge #40 March 21, 2008

It’s Friday and that means it is time for another one of Beate’s wsc.  Wow!  #40 for her sketches.  I started participating in her challenges back when it was at #5 (somewhere around there), and have added to my personal card collection tremendously.  These challenges have been very motivating so I hope you give it a try.  This weeks sketch is quick and fun.

beate wsc #40

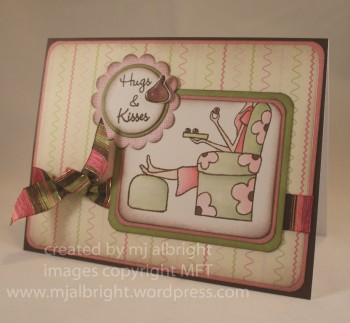
How about some MFT this week showcasing chocolate to get you all in the mood for a yummy Easter this weekend:)  I used MFT set “How Sweet It Is”  for my sketch sample. 
Now, head on over to the blogs of these talented ladies to see more sketch samples:

Cambria Turnbow, Charmaine Ikach, Jenn Balcer, Laurie Schmidlin, Lori Craig, and Sharon Harnist.

Happy Easter everyone and enjoy your weekend!

CARDSTOCK USED:  Papertrey White; Memory Box Patterned and Solid CS

INKS USED:  Adirondack Espresso; SU! Chocolate Chip, Pretty in Pink, Regal Rose, Certainly Celery, Blush Blossom.

ACCESSORIES:  May Arts ribbon; SU! 1-1/4″ & 1-3/8″ Circle Punches, Scallop Punch, 3/16″ Corner Rounder Punch, Aqua-Painter, Sponge, and Crystal Effects to chocolates.


Beate’s weekend sketch challenge #39 March 14, 2008

Filed under: weekend sketch challenge — mjalbright @ 2:04 pm

Yep, it’s Friday.  I’m really excited to be home with my family this weekend to get some things done around the house, catch up on some stamping, and take the kids to a movie.  So, today I thought it was Thursday…lol.  Come on!!  It has happened to all of us right?  Which means I am late with posting my sample for Beate’s wsc #39

Here is my sample that I created.  I switched to focal point to a circle with another Vellum circle to frame in the stamped medallion:

beate wsc #39 

I used SU! Kind Thoughts set that my dear friend (and upline) Deb Kemp let me borrow to play with.  She is the greatest.  Any time I need something, or run out of a product, I run on over to her home and she always provides the supplies I need.  She has helped me out tremendously.   Big Thanks Deb:)

I think this may be my latest favorite color combo:  Vanilla, Soft Sky, and Night of Navy.  It is very elegant.  I read in one of the wedding mags out their that this is a “hot” color combo for weddings.  I see why. 

STAMP SET USED:  SU! Kind Thoughts

CARDSTOCK USED:  Night of Navy, Soft Sky CS and Prints DSP, Very Vanilla, Vellum

INKS USED:  Night of Navy, Versamark

ACCESSORIES USED:  Scallop Punch, 1/16″ Circle Punch, Paper-Piercing Tool (Mat Pack), Silver Brads, Iridescent Ice, the navy satin ribbon I got at my local craft store.

I’ll share with you a pic of the craziness.  I know this has happened to all of us when we are rushing around day to day trying to get everything done.  Remember, it is cold here where I live.

ME:  Ethan!  Run upstairs and change your clothes so we can run to the grocery store.

ETHAN:  Okay Mom.

ME:  Hurry up Ethan.

ETHAN:  (standing at the front door) Mom, I’m ready.

ethan dresses himself

ME:  Get upstairs right now.  You are not wearing Crocs & Swimming Shorts!

Oh the life of a 4 year old.  Changing his clothes 10 times a day.  Gotta love it.

Now, check out the blogs of these talented ladies to see more takes on Beate’s wsc:

Cambria Turnbow, Charmaine Ikach, Jenn Balcer, Laurie Schmidlin, Lori Craig, and Sharon Harnist.

Enjoy your weekend:)


Beate’s weekend sketch challenge #38 Part 1 March 7, 2008

Yeah!   It is Friday and that means it is time for Beate’s wsc.  It has been a long busy week and the weekend will continue with the craziness.  I have a workshop tomorrow with approx 16 guests in attendance….stressin’ just a little cause I have to go right to work night shift after the workshop.  The positive is that I will lose an hour due to the wonderful “spring ahead” factor.  I tend to be a shy person who has trouble with people focusing their attention directly on me…so any sweet little advice that “pro workshop demos” have, it would be greatly appreciated:)  

My Moms b-day was yesterday, so I made my sample with her in mind:

 beate wsc #38 

I wanted it to be bright and cheery for my mom so I went with Pumpkin Pie, Purely Pomegranate, and Old Olive for my color combo – with a touch of black to make some details pop.

Here is a close up to show you the new SU! glitter that I added to the leaves/swirls:

beate wsc #38 upclose

Be on the lookout for Part 2 on Sunday. 

STAMP SETS USED:  Stitched Exotics and SAB set Lots of Thoughts.

CARDSTOCK USED:  Purely Pomegranate, Whisper White, Old Olive, Basic Black, and Pumpkin Pie Prints DSP.

INKS USED:  Purely Pomegranate, Old Olive, and Pumpkin Pie.  White gel pen.

ACCESSORIES USED:  Purely Pomegranate Dbl-stitched Ribbon, Paper Piercing tool/Mat Pack, Crystal Effects, Pop-Up Glue Dots, 1-3/8″ & 1-1/4″ Square Punches, 5-Petal Flower Punch, Old Olive 5/8″ Grosgrain Ribbon, Celery Fine Cosmo Glitter, Earth Elements & Neutrals Colored Buttons.

Make sure to stop by the blogs of the following to see more takes on the challenge:

Cambria Turnbow

Charmaine Ikach

Jenn Balcer

Laurie Schmidlin

Lori Craig

Sharon Harnist

Enjoy your weekend 🙂


My Favorite Things new releases March 5, 2008

Tonight, MFT will be releasing 2 new sets:  Ride em Cowgirl (new mini set) and Punch a Bunch.  Here are a couple samples featuring these sets.

mft happy trails card I absolutely love the way this card turned out.  The body was stamped on different coordinating patterned papers from K&Company Classic K Bailey Mat Pad and pieced together.  Background watercolored and sponged.  Hemp Twine is just the perfect accent for this style.  Added Cowboy Dew Drops that you can purchase at Ellen Hutson’s site.

MFT ms. sheriff card  Here is a Gate-fold card that I used my Scor-Pal on.  This card took some time to make.  I used an exacto-knife to cut out the inner panels and adhered sponged strips of CS….gesh!!!  I used Prismacolor Pencils on this one.  This is my latest addition to my supplies.

Lastly, I used Punch a Bunch set for this one.  This set is really cute.  I have one card to share with you at the moment.  It is a great set for creating cards under 10 minutes (yes…I do know what that is).

mft thanks a bunch card  The middle flowers are cut out and adhered with mini glue dots just to add a little dimension to the card.  This set is made to coordinate with Marvy Uchida Oval Scallop Punches (purple and pink)….or nestabilities would work as well.

Now that I have shared some samples of the new releases, you can join us tonight on the MFT forum on SCS for a release cocktail party.  Hope to see you there.

Enjoy the rest of your day:)